


Introduction

WordPress is written in PHP, so it is necessary to have PHP installed on the server. Hosting companies provide this through their service, while PHP is usually installed locally together with the server as part of a package (WAMP, LAMP, MAMP…). Installing WAMP is already covered in the article “Installing Web Development Tools”. In addition to PHP and a server, a DBMS (DataBase Management System) is needed, usually MySql. Regardless of whether WordPress is installed on a local or remote server, before the installation itself, it is necessary to create a database within which WordPress will create the necessary tables and store data during installation. So the following three things are required to install WordPress:
- Server
- MySql database
- PHP installed
WP installation on local server
Database
We create a database and a user who will have access to the database using the phpMyAdmin application. This application runs in the browser and is called by entering the URL address: localhost/phpmyadmin. Starting this application is also possible via the WAMP icon in the taskbar.
After starting the application in the left section of the page, where there is a list of all databases, click on the “New” button. Specify the name of the database, and since this database is used directly by wordpress, it is necessary to save the selected name because it will be needed during the installation of wordpress. Then, in the “collation” drop-down list, select the “utf8_unicode_ci” value and click the “Create” button.
Base user
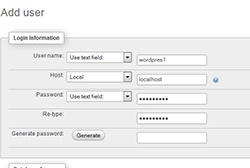
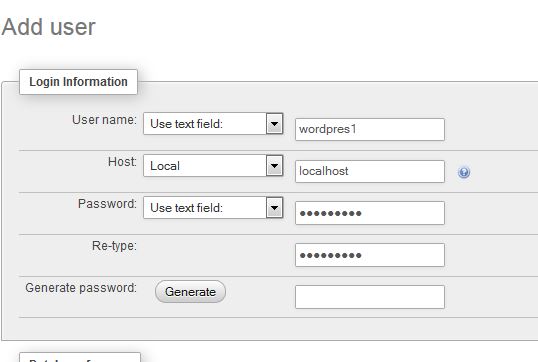
If you don’t already have a database access user that has all privileges and can be used for all databases, you need to create a new user.
- click on the “phpMyAdmin” logo in the upper left corner and you will be returned to the home page
- click on the Users tab
- Click “Add user” to add a new user
- type in the username of the database which we will use later when installing WordPress.
- in the drop-down menu “Host” select “Local”
- enter the password (since we are local the password does not have to be “strong” but for the remote server it is mandatory)
- Then we grant the new user privileges to work with the previously created database, by selecting the option: “Check all”.
- By clicking the “Go” button, you have completed the process of creating a user to access the database.
Installing WordPress
Within the Apache server, the default location where you should place all site files is a folder named “www”, which is located according to the following path:
C:wampwwwfolder_where_the_WP_files_are_located
Inside the folder “www” create a new folder, but pay attention to the name of the folder because it will later be used in the URL address to call the site (localhost/folder_name) so it is important that the name be without spaces. After downloading the WordPress installation from the official page, unzip the .zip archive and copy the contents of the “wordpress” folder into the created folder.
The installation is started by entering the address:
in a web browser
localhost/folder_where_the_WP_files_are_placed
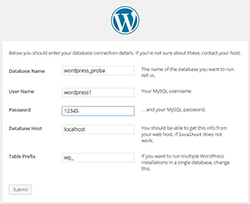
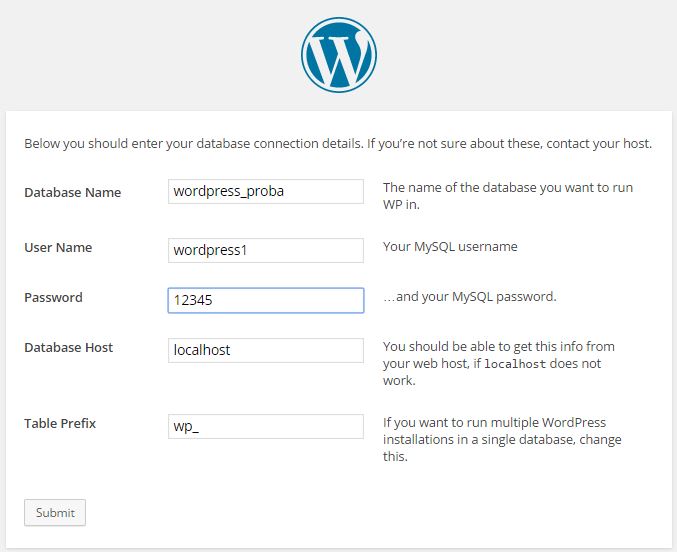
In the form that appeared, enter the language and then other information about the database and the user that we saved when creating the database.
Table prefix is not necessary to change locally because there is no fear of malicious attacks, so it can remain the default value “wp_”.
By clicking on the “Submit” button, if you have completed all the previous steps correctly, a screen will appear with confirmation that communication with the database has been established and a button to start installing WordPress on your computer.
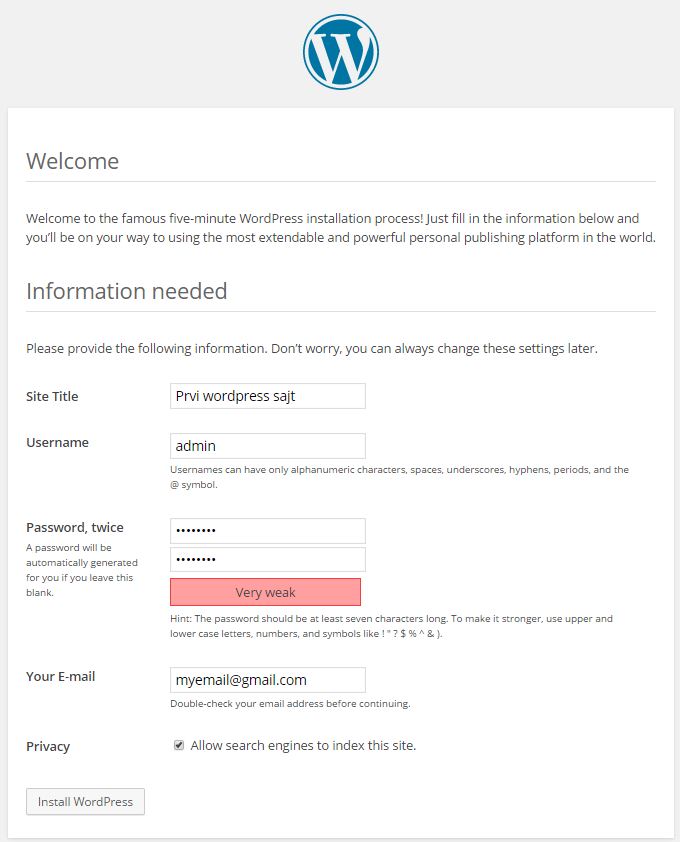
After clicking on the button “Run the install” you need to enter:
- site name
- username
- password to access the site
- e-mail address to which you will receive certain notifications about activities on the site
The username and password you enter are used to log in to the site, i.e. for access to the admin panel and have nothing to do with the database username and password. After entering this data and clicking the button “Install WordPress” you have successfully installed WordPress.
WP installation on an external server
There is software on the servers that serves to manage the hosting, most often it is cPanel but it can be any other within which we can find the “phpMyAdmin” application.
Creating database
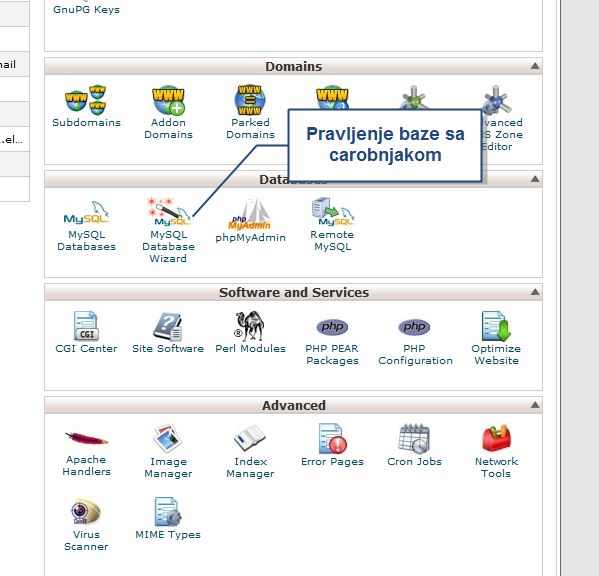
We can create the database and the users who will have access to the database as standard through the “phpMyAdmin” application or use the “MySql dabase wizard” application, which has a more intuitive approach and is easier for beginners. Both applications come as part of cPanel.
- Username and password:
Username: Since the user will be WordPress, it doesn’t matter which name is used because we only enter it once (good practice is that it should be the same as the name of the database, but we should be careful not to make it too long, because the part that we choosecan be max. 7 characters long).
Password: This password must be extremely strong, it is recommended to use a password generator, when using it you must check that you have copied and saved the generated password. - Base name
The base name consists of two parts. The first part of the name ie. the prefix is created by cPanel and is different from the default “wp_” because it makes it harder to break wordpress protection, while the second part of the database name is chosen by us. Save the full name for later use during installation. - Create user
Since the user is wordpress, it is necessary to check all privileges before creating a user.
Transfer files to the server
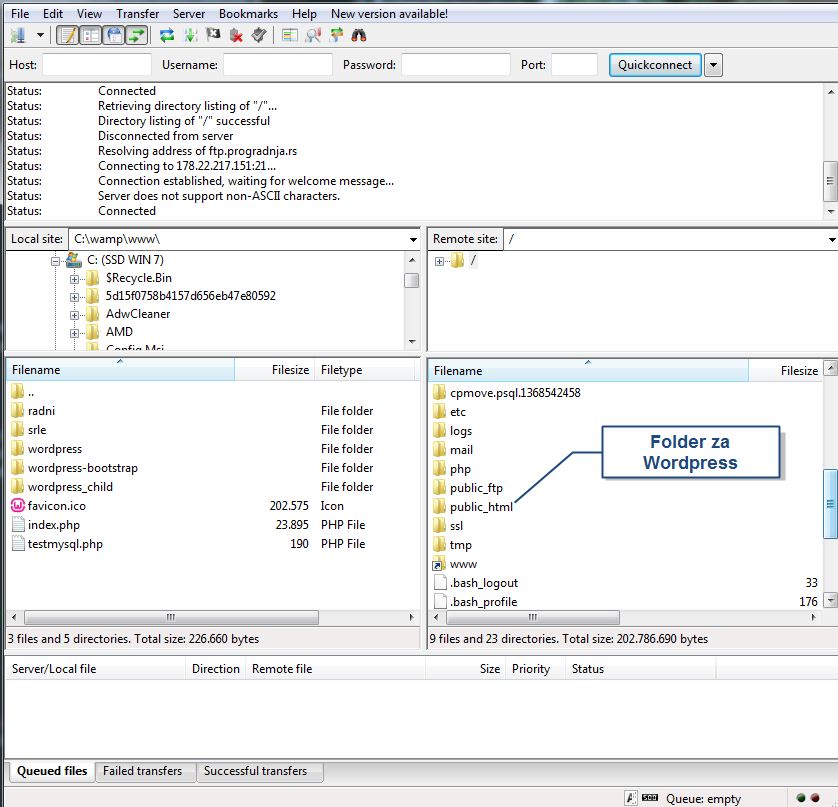
After downloading the latest wordpress installation from the wordpress.org home page, unzip the archive and use an application (e.g. FileZilla) that supports the FTP or SFTP protocol to transfer files to the server. After entering the data obtained from your provider and necessary for logging into the FTP application, start the connection.
- Host: domainname.rs
- Username: is provided by the provider
- Password: is provided by the provider
After establishing a connection with our site, find the public_html folder and place the downloaded files from the wordpress folder necessary for installation into it. If you want to install WordPress in a subdomain, you need to create a new folder inside the public-html folder and place the files for wordpress installation in it.
Installing WordPress
In order to start the installation in the browser, enter the address of our domain, e.g. “nekidomen.rs”. A welcome window appears immediately, in which we are expected to choose the language that we will use during the installation. After selecting the language, the installation begins, so in the next window, you need to fill in the following fields:
- Database name – saved name of the database when creating the database
- User Name – saved user name when creating the database
- Password – saved password when creating the database
- Database Host – leave locahost
- Table prefix – a good practice is to change the wp_ prefix to something else.
Click on Submit and then Run the install, after which it is necessary to enter:
- site name
- username
- password to access the site
- e-mail address to which you will receive certain notifications about activities on the site
It is important to note that the username and password you enter are used to log in to the site, ie. to access the admin panel where you make changes or add new content to your site. Therefore, it is extremely important that you assign a password that complies with the strong password policy when you put your site online, and for now you can set any values. After entering this data and clicking the button “Install WordPress” you have successfully installed WordPress. After successful installation you can log inas an administrator to your site at www.nazivdomena.rs/wp-login.php
wp-config.php
This is a file that stores the necessary data for the operation of WordPress, and is located in the root of the WordPress folder. It contains data related to the database, database user, username, password as well as many others, here you can edit and change some settings if necessary. An example of a standard wp-config.php file.
|
1 2 3 4 5 6 7 8 9 10 11 12 13 14 15 16 17 18 19 20 21 22 23 24 25 26 27 28 29 30 31 32 33 34 35 36 37 38 39 40 41 42 43 44 45 46 47 48 49 50 51 52 53 54 55 56 57 58 59 60 61 62 |
// ** MySQL settings - You can get this info from your web host ** // /** The name of the database for WordPress */ define('DB_NAME', 'database_name_here'); /** MySQL database username */ define('DB_USER', 'username_here'); /** MySQL database password */ define('DB_PASSWORD', 'password_here'); /** MySQL hostname */ define('DB_HOST', 'localhost'); /** Database Charset to use in creating database tables. */ define('DB_CHARSET', 'utf8'); /** The Database Collate type. Don't change this if in doubt. */ define('DB_COLLATE', ''); /**#@+ * Authentication Unique Keys and Salts. * * Change these to different unique phrases! * You can generate these using the {@link https://api.wordpress.org/secret-key/1.1/salt/ WordPress.org secret-key service} * You can change these at any point in time to invalidate all existing cookies. This will force all users to have to log in again. * * @since 2.6.0 */ define('AUTH_KEY', 'put your unique phrase here'); define('SECURE_AUTH_KEY', 'put your unique phrase here'); define('LOGGED_IN_KEY', 'put your unique phrase here'); define('NONCE_KEY', 'put your unique phrase here'); define('AUTH_SALT', 'put your unique phrase here'); define('SECURE_AUTH_SALT', 'put your unique phrase here'); define('LOGGED_IN_SALT', 'put your unique phrase here'); define('NONCE_SALT', 'put your unique phrase here'); /**#@-*/ /** * WordPress Database Table prefix. * * You can have multiple installations in one database if you give each a unique * prefix. Only numbers, letters, and underscores please! */ $table_prefix = 'wp_'; /** * WordPress Localized Language, defaults to English. * * Change this to localize WordPress. A corresponding MO file for the chosen * language must be installed to wp-content/languages. For example, install * de_DE.mo to wp-content/languages and set WPLANG to 'de_DE' to enable German * language support. */ define('WPLANG', ''); /** * For developers: WordPress debugging mode. * * Change this to true to enable the display of notices during development. * It is strongly recommended that plugin and theme developers use WP_DEBUG * in their development environments. */ define('WP_DEBUG', false); /* That's all, stop editing! Happy blogging. */ /** Absolute path to the WordPress directory. */ if ( !defined('ABSPATH') ) define('ABSPATH', dirname(__FILE__) . '/'); /** Sets up WordPress vars and included files. */ require_once(ABSPATH . 'wp-settings.php'); |
Apache Virtual Host
The following procedure for creating a virtual host is not directly related to WordPress, but to the Apache server, but due to its frequent use when creating a website, I will cover it here. The default server during installation is localhost and access to different sites located on the same server is enabled by adding the name of the folder in which the site is located to the name of the server, e.g. localhost/site_folder_name.
Virtual hosts allow hosting and calling multiple independent websites on one server with different server names.
VirtualHost is created in two steps:
- Creating a new VirtualHost section in the Apache configuration files
- Adding a new host in Windows
Apache configuration
Apache’s configuration is defined in the file “httpd-vhosts.conf”, located inside the extra folder whose path is:
C:wampbinapacheapacheVersionNumberconfextra
By adding a piece of code to the bottom of the file “httpd-vhosts.conf”, we define the new name of our virtual server, i.e. our website addresses:
|
1 2 3 4 5 6 7 |
<VirtualHost *:80> ServerAdmin admin@testiranje DocumentRoot "c:/wamp/www/naziv_foldera" ServerName novi_naziv_servera ErrorLog "c:/wamp/www/error_naziv_servera.log" #CustomLog "logs/testiranje.log" common </VirtualHost> |
Code Explanation:
- DocumentRoot defines where the files related to the site
- ServerName defines a new server name, i.e. addresses for calling the site
- ErrorLog defines the location and file name where error data will be saved
- CustomLog is commented and in case it is uncommented it defines directives for a new custom log file
are located
NOTE: RESTART APACHE SERVER after modifying the file!
Defining a new host
Once we have defined the virtual server, we need to let Windows know where that server is located, i.e. where is his host. Since it is only a fictitious server and it is actually located in the local computer, its address is localhost ie. 127.0.0.1. Adding a new host in Windows is done inside the “host” file located:
C:WindowsSystem32driversetchosts
NOTE:
In order for windows to allow modification of this file, it is necessary to open this file from a text editor (SublimeText, PhpStorm…) as an administrator (right click on the application icon and select “Run as administrator”).
With the addition of the following code at the bottom of the file, we define to Windows that our new virtual server is called from the local area (127.0.0.1 === localhost).
127.0.0.1 new_server_name
This technique allows that even if there is a server on the Internet with the same address, windows will call the local server. To access the remote server, it is enough to comment the add line.