


What are git submodules?
Submodules are projects (most often some libraries) that are inserted into another project, after which the so-called all submodule files available to the “main” project. Git submodules allow us to use two or more repositories as if they were one. Each repository maintains its own change history, so even submodules are updated independently of the main repository. When you clone or pull a repository with a submodule, the main repository only gets a link to where it will “pull” the submodule’s code from.

Submodules are useful if you have code or content in one git repository that you want to use in multiple other git-managed projects, but still want to keep the change history separate. For example, you may be using a library that is under active development and you need to develop your application code along with any submodule changes.
When you add a subdmodule to Git, you don’t add the entire code of the subdmodule to the main repository, you only add information about the subdmodule. This information describes which commit the subdmodule points to. Therefore, subdmodules will not be updated when the main project repository is updated. This may be desirable behavior, as your code may not work with the latest subdmodule changes, thus preventing the application from crashing unexpectedly.
In this article we will use two projects from github: one as the main (https://github.com/choslee/gitSubmodulMasterParent and the other as a submodule (https://github.com/choslee/gitSubmoduleChild).
Inserting a submodule into a project
While in our “parent” project, adding a submodule requires only its url and using the command git submodule add:
|
1 |
gitSubmodulMasterParent>git submodule add https://github.com/choslee/gitSubmoduleChild |
After executing this command, two new files appear:
- .gitmodules
- A new folder containing the entire subproject (in our example “gitSubmoduleChild”))
Then these changes need to be committed and sent to the cloud:
|
1 2 3 |
gitSubmodulMasterParent>git add . gitSubmodulMasterParent>git commit -m "adding submodule" gitSubmodulMasterParent>git push origin master |
Cloning a project with a submodule
Now that we have a project on the cloud (e.g. GitHub) that contains a subproject, i.e. submodule we need to clone it. There is one more step involved in cloning projects with a submodule compared to a regular project. First, we’ll do a standard project clone:
|
1 |
git clone git@github.com:choslee/gitSubmodulMasterParent.git |
After cloning, a folder with the name of the subproject can be seen within the project, but it is empty! In order to fill it, it is necessary to initiate and then update it with the following commands:
|
1 2 |
gitSubmodulMasterParent>git submodule init gitSubmodulMasterParent>git submodule update |
After these two commands, the submodule will be initiated and then cloned, we can replace these two commands with one:
|
1 |
gitSubmodulMasterParent>git submodule update --init |
Sending changes to the cloud
Changes to the main project
If we make changes within our main project we will simply send them with the standard commands:
|
1 2 3 |
gitSubmodulMasterParent>git add . gitSubmodulMasterParent>git commit -m "let the message change" gitSubmodulMasterParent>git push origin master |
Changes tosubproject
However, if we make some changes to the submodule files from our project and check the status, we will get the following report:
|
1 2 3 4 5 6 7 8 9 10 11 |
gitSubmodulMasterParent>git status On branch master Your branch is up to date with 'origin/master'. Changes not staged for commit: (use "git add <file>..." to update what will be committed) (use "git restore <file>..." to discard changes in working directory) (commit or discard the untracked or modified content in submodules) modified: gitSubmoduleChild (modified content) no changes added to commit (use "git add" and/or "git commit -a") |
In the report we see that the main project has no changes, but we see that the content of the submodule has been modified. If we try to add changes to the index with the command git add . nothing will happen because there are no changes to the main project. In order to send the changes made in the submodule, it is necessary to commit and push from that folder, which means that we must first change the location:
|
1 |
gitSubmodulMasterParent>cd gitSubmoduleChild |
And then do everything there:
|
1 2 |
gitSubmoduleChild>git add . gitSubmoduleChild>git commit -m "change message" |
After this, the repository inserted as a submodule will be updated.
NOTE:
It is always necessary to first pull all changes from a submodule before pushing to the server (see section “Updating submodules”)
We should note that these submitted changes will not be seen on the main project’s Github, but on the subproject’s GitHub.
Submodule update
When we want to update the subProject ie. submodule then we can’t do it just by updating the main project with the standard commands:
|
1 |
gitSubmodulMasterParent>git pull origin master |
Because a standard pull will not update the submodule, neither locally nor in the cloud. On the local we will notice that there are no new or changed files, while on the cloud (e.g. GitHub) we notice this by observing the number of commits next to the name of the submodule folder. That commit number must be the last commit number of the co-project. See the subproject’s commit count in the following image:
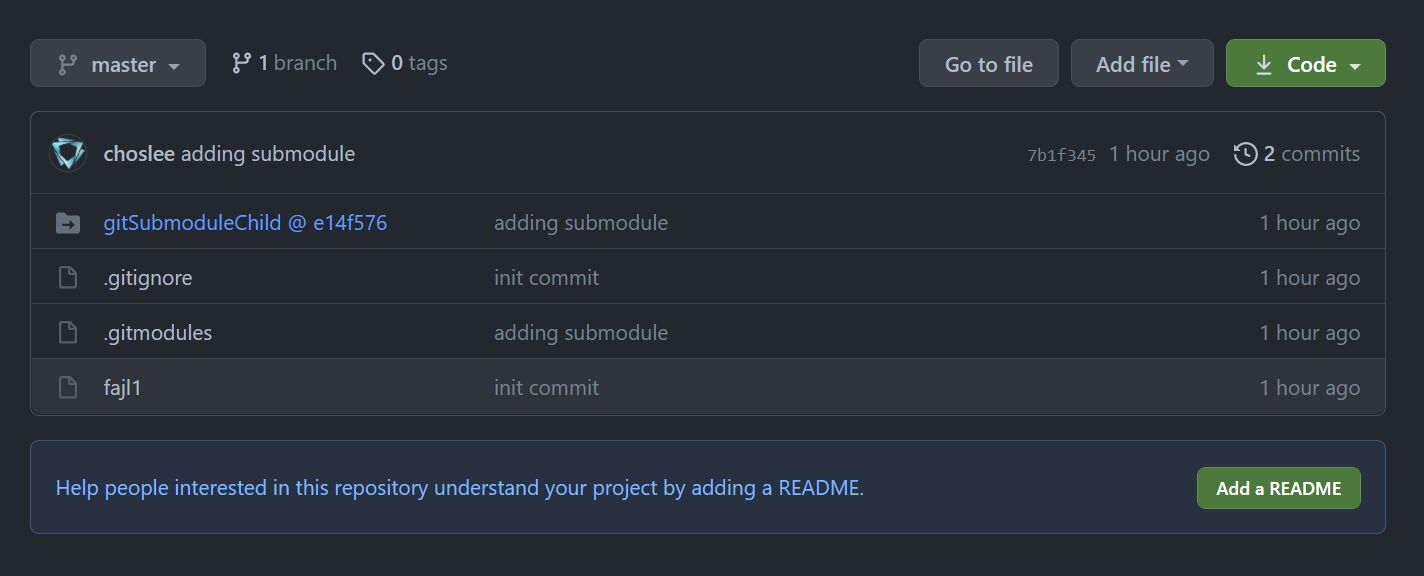
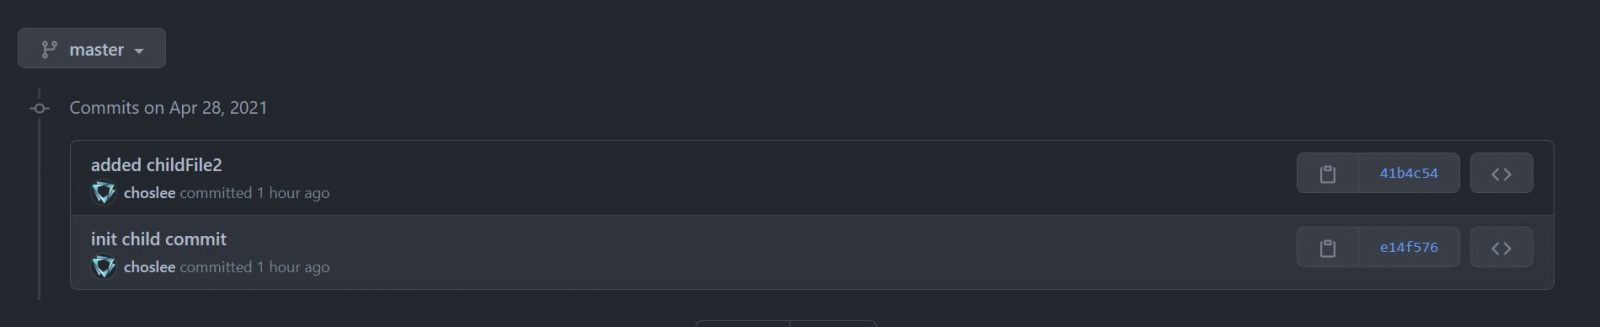
As you can see in the image, the last updated commit has the number “e14f576”, and when we look at the real state of the commit in the subproject, we see that it has one newer commit “41b4c54” (see the image below):
I way
You need to enter the submodule first:
|
1 |
cd gitSubmoduleChild |
Then pull back his changes:
|
1 |
gitSubmoduleChild>git pull origin master |
When we return to the main project folder after this command and check the status, we get the following:
|
1 2 3 4 5 6 7 8 9 10 11 |
gitSubmoduleChild>cd .. gitSubmodulMasterParent>git status On branch master Your branch is up to date with 'origin/master'. Changes not staged for commit: (use "git add <file>..." to update what will be committed) (use "git restore <file>..." to discard changes in working directory) modified: gitSubmoduleChild (new commits) no changes added to commit (use "git add" and/or "git commit -a") |
So now we can commit and send changes to the cloud:
|
1 2 3 |
gitSubmodulMasterParent>git add . gitSubmodulMasterParent>git commit -m "rucno azuriran submodul" gitSubmodulMasterParent>git push origin master |
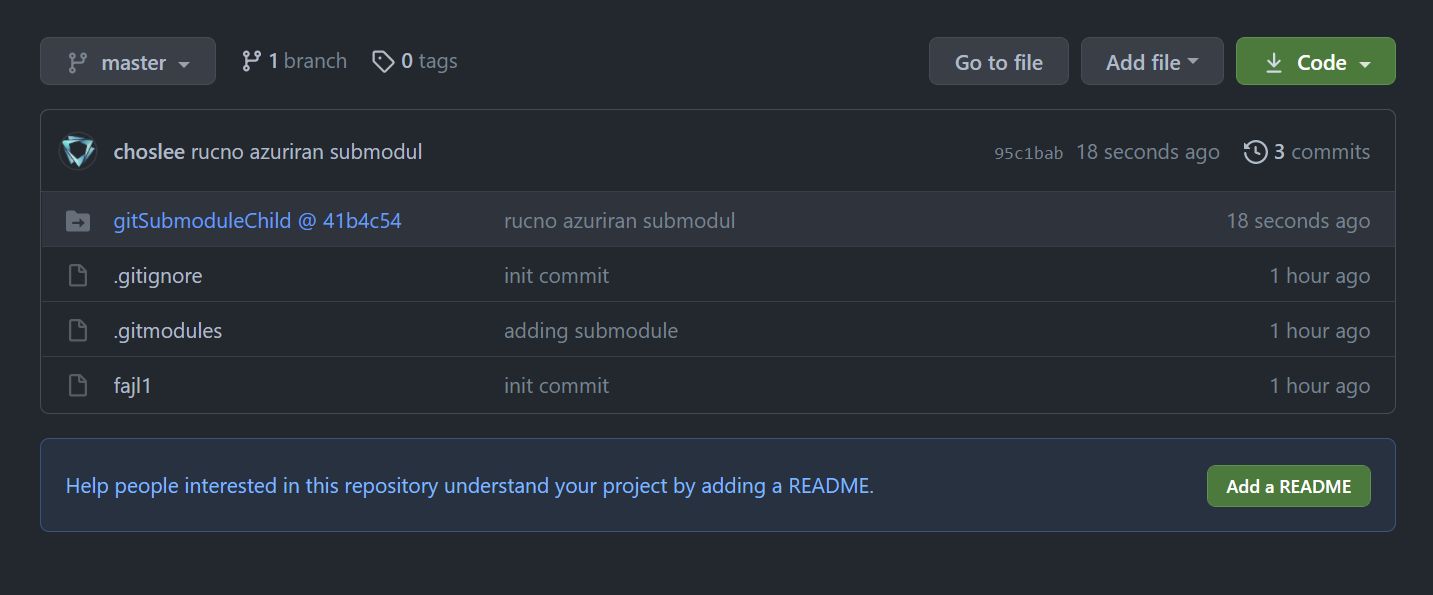
Only after this, the last changes in the submodule framework will be displayed on the cloud, and the last commit number of the submodule “41b4c54” will be visible, see image:
II way
This way is easier because we can do everything while we are in the main project directory. To update a submodule, use the command:
|
1 |
gitSubmodulMasterParent>git submodule update --remote |
When we check the status after this command, we get the following:
|
1 2 3 4 5 6 7 8 9 10 |
gitSubmodulMasterParent>git status On branch master Your branch is up to date with 'origin/master'. Changes not staged for commit: (use "git add <file>..." to update what will be committed) (use "git restore <file>..." to discard changes in working directory) modified: gitSubmoduleChild (new commits) no changes added to commit (use "git add" and/or "git commit -a") |
Here you can see that the changes exist within the framework of the submodule, and it is now possible to commit and push to cloud:
|
1 2 3 |
gitSubmodulMasterParent>git add . gitSubmodulMasterParent>git commit -m "message that the submodule has been updated" gitSubmodulMasterParent>git push origin master |
After which the number next to the submodule will be updated indicating the last commit of the submodule.
Deleting a submodule from a project
Deletion is done in a couple of steps:
- Delete the folder in our project that represents the submodule
- If we have only one submodule then yes is enoughdelete the file “.gitmodules” otherwise we need to edit it and delete the part related to our submodule
- In the “.git” folder, find the “modules” folder and delete the submodule within it.
- In the “.git” folder you need to find the file “config” and delete the part related to our submodule inside it:
123[submodule "gitSubmoduleChild"]active = trueurl = https://github.com/choslee/gitSubmoduleChild
After this, it is necessary to commit these changes and push them to the cloud.
NOTE:
Deleting a submodule from the project does not affect the repository of that submodule itself, it continues to “live” on the cloud.